Loading..
Sponsored By :GoogleAdsense.
Showing posts with label trik blog. Show all posts

Tuesday, November 29, 2011

How To Start a Google AdSense Account and Make Money Blogging

Starting a new account with Google AdSense is one of the easiest ways to start monetizing your blog. While Google AdSense might not make you rich, it's a simple and useful tool. In fact, it's usually the first step bloggers typically take to earn an income from their blogs because it is so easy to get started.
Difficulty: Easy
Time Required: 10-15 minutes to open an account. Additional time to research the options to monetize your blog.
Here's How:
  1. Read the Google AdSense program policies.
    Familiarize yourself with what you can and cannot do as part of the Google AdSense program to ensure you're prepared to start your new account.
  2. Visit the Google AdSense home page.
    Click on the 'Sign Up Now' button in the upper righthand corner of your screen.
  3. Complete the online application.
    You will need to provide your blog's URL and primary language as well as answer some questions related to the rules of the Google AdSense program. You'll also need to provide your payment information to receive the money you generate on your blog from Google.
  4. Access your new account and review the ads available to you.
    Google AdSense provides a wide variety of advertising options to bloggers from text ads to image ads and more. Take some time to research everything that's available to determine what will work best for your blog.
  5. Select your ad design choices.
    Once you've decided which ad opportunities are best for your blog, select them. Google will provide a snippet of HTML code to you after you make your selection.
  6. Insert your Google AdSense HTML code into your blog.
    Copy and paste the HTML code provided by Google into your blog's template. One of the easiest ways for a beginner blogger to do this is by inserting a text widget into his or her blog's template and pasting the code in the widget.
  7. Let Google do the rest.
    It may take a few hours or a few days for Google to start serving ads on your blog. Google will search your blog to determine the predominant subjects of each page. When readers visit your blog, the HTML code you pasted into your blog from Google will activate and relevant ads will be displayed based on each page's content.
  8. Collect your money.
    Remember, Google AdSense typically pays based on click-throughs (the number of times people click on an ad). Therefore, Google AdSense is unlikely to generate a large income for you, but every bit helps!
Tips:
  1. Read and adhere to the Google AdSense policies in full before you sign up for a Google AdSense account. If you violate any of the policies, your account will be cancelled.
  2. Take some time to perfect your Google AdSense program once you get started by learning the steps you need to take to increase your Google AdSense earning potential.

Sunday, July 31, 2011

Membuat daftar link animasi cloud

Salam dunia maya, semoga sobat sekalian dalam keadaan sehat dan tetap dalam lindungan Tuhan Yang Maha Esa, tips berikut adalah hasil dari modifikasi membuat Tag Cloud dengan Animasi, yang saya coba berikan kali ini adalah tidak di peruntukan untuk Tag tapi sekedar untuk kumpulan link sobat untuk di buat seperti animasi tag cloud dan tidak menggunakan kode javascript hanya modifikasi dari flash.

kode untuk link animasi

id="tagcloud" name="tagcloud" bgcolor="#252424" quality="high" flashvars="hicolor= 0xffffff&tcolor=0xF3A217&mode=tags&distr=true&tspeed=100&tagcloud=<tags>  
  
<a href='http://ordinaryblog.info/' style='24'>Teks Link</a&gt  
  
  
</tags>"   
  
allowscriptaccess="always" width="350" height="150">

Untuk modifikasi tampilan

bgcolor=#252424 (warna latar)
tcolor=0xF3A217 (warna huruf)
hicolor= 0xffffff (warna hover)
width="350" (lebar)
height="150" (tinggi)
style=24 (besar huruf)

Cara menempatkan

  • Ini tergantung dari sobat sekalian , dapat di tempatkan di sidebar atau di dalam postingan seperti preview diatas
  • untuk penempatan di dalam postingan kode yang sobat copy di encode/parse terlebih dahulu
  • untuk membuat animasi label tag cluod bisa langsung ke sumbernya http://www.bloggerbuster.com/2008/08/blogumus-flash-animated-label-cloud-for.html


Socializing your feed with Twitter

Sometimes you reach across the hedgerow to share with your nearby neighbors. Other times, members of the household move away and yet you can't keep from calling to remind them to wear a hat and such because it's chilly out. Today, we're celebrating acquaintances near-and-far by launching the ability to send your feed to Twitter.


FeedBurner has always been about measuring, managing, and monetizing syndicated content. Our hope is that by providing one application in which you can direct your feed in real-time to a number of endpoints, in this case Twitter in addition to the myriad feed readers, aggregators, and search engines that we have always supported, and then following on with providing analytics for measuring exactly how and where your feed gets distributed across social media, you can make better and more informed decisions about how to monetize your content.


Many of our publishers who have tried our Google Analytics feed item link integration have already noticed that their most popular feed items have been shared many times on Twitter.


We're now taking our distribution and analytics a step further by enabling the ability to automatically publish the feed items that meet your criteria to Twitter, using the Google URL shortener at goo.gl.

To get started, go to the Socialize service on FeedBurner's Publicize tab and add the Twitter account to which you would like to post items from your feed. You can take the default settings and click [Save] to start socializing immediately, or use the options we offer to customize exactly which feed items are sent to Twitter and how exactly you would like them to look. The next time you post a new item to your feed it will be sent to Twitter (as always, make sure to ping FeedBurner whenever you update your feed so this process happens as near real-time as possible).

For full details on all Socialize options, see our FeedBurner Help Center topic.


To see the results, take a look at the Twitter account in which you are sending your updates. This blog post, for instance, as well as select blog posts from this and the FeedBurner status blog, will appear from now on at http://twitter.com/feedburner. If Twitter is where you are consuming most of the latest content these days, please follow @feedburner to receive our updates in your favorite Twitter client. source

Your stats, right away

Do you hate delays? Do you think being told to “Please wait…” by websites, cash machines, call centers, and the doughnut stand drive-thru guy in the year 2010 is a sure sign modern living isn’t quite meeting our collective expectations as a planet?


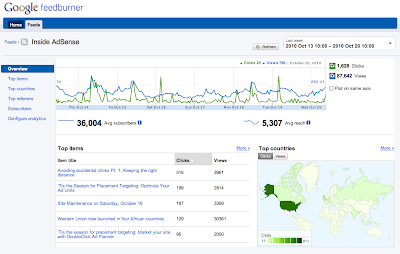
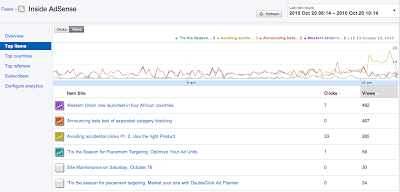
Good news! Today, we will be rolling out a new, experimental interface for Google FeedBurner. The real story is what’s new under the hood, however: the new interface provides real time stats for clicks, views, and podcast downloads, which means you can start seeing what content is drawing traffic from feed readers, Twitter, and other syndicated sources as it happens.


Additionally, if you use the FeedBurner Socialize service, and your platform uses PubSubHubbub or you ping us when you post, you can for the first time get stats on how much traffic your feed items are receiving from Twitter, as well as feed reading platforms like Google Reader in one place. Again, all within seconds of posting your content. Ping? Pong! Yep. That fast.


Your subscriber and reach numbers are still calculated based on a whole day's worth of requests, and are based on the traffic you received yesterday and before; but your item stats reflect the traffic you are receiving right now.


You can access the new interface by visiting http://feedburner.google.com/gfb/ or logging into feedburner.google.com and then clicking on the "Try out the NEW (beta) version!" link at the top.


The best way to see these real time features is to publish a new post and then switch to the “Last two hours” view to begin seeing updates.


To access feed management or previous analytics functionality, you can continue using the original interface at feedburner.google.com.


In the new interface, we are focusing on two things: our new real-time stats presentation and getting messages about and issues with your feed posted to the top-level dashboard, so that you can better diagnose any issues that may prevent your feed from being delivered in real time. If you have any comments or questions, look for the “Send Feedback” link at the top of the page to tell us what you think. source

Saturday, July 30, 2011

Membuat daftar isi blog


Daftar Isi di gunakan untuk mempermudah, para pengunjung blog melihat artikel-artikel apa saja dalam sebuah blog. Nah kali ini saya mendapat script yang bagus untuk membuat daftar isi tersebut di dalam sebuah blog, gimana tertarik juga untuk membuatnya. O iya script ini saya dapatkan dari blognya AbuFarhan [dot] com. makasih Abu Farhan buat scriptnya,...


Jadi lumayan khan jika pengunjung melihat daftar isi ini, terus tertarik dengan beberapa posting artikel yang sudah kita buat, he he he jadi di klik untuk di lihat, keren. Jangan lupa untuk menambahkan link DAFTAR ISI di Tab Menu ( Menu atas) Baca juga tentang tutorial seputar tab menu di Seputar link menu di sini


Dan pastikan juga postingan dan artikel kamu telah memiliki kategori atau label. (Jika tidak maka judul-judul postingan daftar isi tidak akan muncul) Oke langsung aja nih diah! script membuat daftar isi blogger-nya. Copy-paste kode di bawah ini :


  • Ganti alamat URl saya http://piss-blogger.blogspot.com dengan URL milik kamu
  • Kemudian Paste-kan di postingan baru, beri judul DAFTAR ISI
  • Jangan di "Compose" tapi KLIK Edit HTML

  • Kemudian baru paste-kan kode di atas.
  • Terakhir Terbitkan Entri
  • Dan Lihat.
Yap! tampilannya agak mirip-mirip site map yah!. Tampilannya akan seperti contoh kurang lebih, oke selamat mencoba script daftar isi blognya, salam.

Thanks source!

Usefull widget blog for your cool blog


Blogger is a great free blog platform that is improving every day. New useful hacks and widgets are being created on a regular basis. Here is a list of some of the very best blogger widgets and blogger hacks that will improve the usability of your blog.

Blogger Hacks


Related Posts Widget
Display related posts beneath each of your blog posts. Links are displayed based on labels given to each post.


Tag Cloud Widget
Display a simple tag cloud in your blog's sidebar. The tags are displayed based upon the labels given to each post.


Random Posts Button
This widget creates a link for your template that directs users to a random post when clicked on.


Change the Favicon
Are you tired of the regular organge favicon provided by blogger? This tutorial will teach you how to display your own customized favicon.


Top Commentators Widget
Reward your readers for commenting on your blog with this widget. The widget displays the names of the top commentators and will direct you to their website when clicked on.


Change the Title Tags for More Search Engine Traffic
This tutorial teaches you how to make your post title show up before your blog title in Google search results. This is very important when it comes to Search Engine Optimization!


Recent Posts with Thumbnails
Grab your readers attention with an appealing recent posts widget which includes thumbnails.


Recent Comments Widget
Make your blog look alive by displaying recent comment discussions.


Digg Vote Button
Let your Digg readers Digg your posts directly from your blog with this handy little widget.


Search Bar for Blogger
This widget displays a small search bar in your blog's footer. Your readers will be able to easily search your blog for specific content.


Table of Contents
Allow your readers to easily navigate through your site with an interactive Table of Contents.


Blog Widgets


Facebook Widgets
Connect your blog or website with your Facebook Account using these powerful widgets.


Currently Online Readers Widget
A small widget which display how many users are currently online. The widget also indicates which pages are currently being looked at.


Contact Admin Widget
Let your users stay in touch with you with this contact form.


Post Ratings by Outbrain
Let your users give your post a star rating from one to five.


Social Bookmarking Widget 
This widget lets your users to easily bookmark your blog posts at the bottom of each post.


PageRank Buttons
 Showoff your blog's Google PageRank with this small widget.


Google Talk Chat Back Badge 
A Google Talk chatback badge will let visitors to your web page chat with you. They'll be able to chat with you whenever you're signed in to Google Talk.


Twitter Widget Tools 
A great post containg 502 twitter widget tools, buttons, and icons for Engaging your followers.


PayPal Donation Button
If you've got a loyal reader community that might be willing to sponsor you as a blogger, this would be the way.


Google Buzz Share Button
Another way to share your content across a great social network.


Performancing Ads Widget
Another way to make some money from your blog by letting others advertise on your site.


Sudoku Puzzle Widget
Have some fun on your blog with this interactive sudoku game that will easily go in the sidebar.  The sudoku has five different levels of difficulty.


Other


Change Your Template 
Choose from a huge list of custom blog templates. Providing your blog with a new design will make it look fresh and new.


Switch to a Custom Domain
Upgrade your blog to your own domain name such as YourDomainName.com


Thanks source!

Facebook widget, tool for your optimation blog and website


Facebook is the largest social networking site with more than 400 million active users and is growing larger every day! Make sure to use these Facebook widgets for your website or blog to connect with your large Facebook audience. You can use these tools to easily share certain profile information, websites, blogs, and businesses with the Facebook community.

Personal Profile Widgets


Like Badge
Display your Facebook pages for all to see.


Profile Badge
Create a Facebook profile badge to share selected profile information on your website. A profile badge will allow your users to easily connect with you and add you as a friend.

Photo Badge
This photo badge allows you to share your Facebook photos on websites and blogs. Choose from a vertical, horizontal, or two-column layout and also choose the number of photos to be displayed.

Basic Widgets for Website or Blog


Like Box
This allows your users to publish their content and activity to Facebook.


Share Button
A powerful facebook widget which allows your visitors to share your content on Facebook! An excellent Facebook widget for blogger.


Page Badge
Lets you share your Facebook page (one that you have created) information on your website.


Twitter Link
Connect your Facebook page with Twitter. Whenever you update your Facebook page, your twitter followers will be updated as well with a tweet. A great Facebook widget for your website!


Developers Widgets for Website or Blog


Like Button
Allows facebook users to share web pages from your website on their profile.


Comments Box
Lets your users comment on your website content with their Facebook account.


Recommendations
Provides your website users with personalized suggestions for pages to visit.


Live Stream
Lets Facebook users to post and share content in real-time.


Activity Feed
Lets users know what their facebook friends are doing on your website through comments and likes.


Login Button
Displays a login button along with profile pictures of facebook friends who have already signed up.


Facepile
Shows profile pictures of people who have liked your facebook page or have signed up for your webpage.
Thanks to source

Blogger tag cloud widget by categorize

This widget is perfect for blogspot users who desire a simple tag cloud for their Categories. The Labels Cloud can easily be implemented within the sidebar of your blog and will match your template wonderfully.
Steps for Implementation

Step 1: Back it Up
Always make sure to back up your Blogger Template before doing anything else!

Step 2: The Labels Gadget

Make sure that you have the Labels Page Element installed. If you haven't already...
  • Go to Layout >Page Elements .
  • Click "Add a Gadget" and then add the "Labels" gadget.
Step 3: Locating the "Old Code"
  • Now go to Layout >Edit HTML
  • Make sure that the "Expand Widgets Template" box is unchecked.
  • Now we need to search for the code that looks like this.
Your code may look a little different. So try using your browser's search tool to find type='Label'.

Step 4: Replacing the "Old Code" with the "New Code"
  • Once you've located type='Label', remove the whole line of code that looks just like the code mentioned in part 3 of step 3.
  • Replace this code that you've just deleted with the code below:
/*
Distributed by John Smith at WidgetsForFree.blogspot.com
*/


Powered by Blogger Widgets

Step 5: Previewing the New Tag Cloud
Before saving the template make sure to click preview. The new tag cloud should now be visible. If not, make sure that you've completed all the steps correctly.

Thanks source

Membuat navbar Google Friend Connect


Google Friend Connect (GFC), selain memiliki fungsi sebagai pertukaran link blogger profile ternyata juga sangat banyak pilihan widget dan fungsi navbar yang bisa di tambahkan di blog Anda.


Salah satunya yaitu menambahkan navbar GFC (semacam bar navigasi) di dalam blog Anda. Fungsinya hampir sama dengan GFC yang berada di sidebar widget namun biasa fungsi navbar di pergunakan untuk merapatkan atau menyelipkan di atas ataupun di bawah header ataupun footer blog Anda, sehingga penampilannya bisa menghemat sidebar blog Anda.


Sebelumnya saya pernah juga membuat menambahkan Buku tamu dengan google friend connect, dan sekarang dua fungsi dapat di lengkapi dengan GFC navbar ini, yaitu profile pengikut sekaligus buku tamunya (hemat khan!) contohnya bisa Anda lihat di http://www.ossamples.com/socialmussie/


Penasaran oke sekarang kita mulai cara menambahkan Navbar GFC di dalam blog.


Buka Google Friend Connect --- www.google.com/friendconnect
Masukan email dan password (saya sarankan gunakan email dan password blogger profile milik Anda)


Di situ ada form di situs mana navbar GFC akan di buat, namun jika kamu sudah mempunyai akun blogger maka tinggal di klik saja nama blog Anda (di sebelah kiri).


KLIK Ramban galeri gadget --- Pilih Social Bar


1. Selanjutnya pada OPSI


  • Pilih posisi navbar : Atas/bawah (terserah Anda).
  • Beri tanda centang pada ikutkan gadget komentar -jika Anda ingin menyertakan komanter, bila tidak -di hilangkan saja tanda centangnya.
  • Komentar berlaku : pilih seluruh situs, kecuali dalam satu akun blogger Anda memiliki lebih dari satu blog bisa di pilih laman atau id (ini adalah id masing2 blog berbeda, lihat pada jendela browser pada saat login ke blog anda rearrage?blogID=3029274859473524).
  • Bubuhi teks berikut di area komentar: bisa di ubah sesuai keinginan Anda.
  • Tajuk komentar: juga sama bisa di ubah sesuai kemauan Anda
  • Izinkan pengunjung mengeposkan tautan YouTube : adalah izin tuk mengeposan tautan dari youtube.
  • Izinkan pengeposan anonim : Jika di beri centang maka siapa saja bisa berkmentar di navbar, sebaliknya jika tidak di beri centang hanya pengguna Akun blogger saja yang bisa berkomentar di navbar komantar.


Jika sudah selesai pengaturannya :


2. KLIK BUAT KODE
Copy pastekan di tambah gadget --- Pilih Html/javascript pada blog Anda.


Jika cara ini tidak berhasil


KLIK Edit Html cari kode
kemudian Copy pastekan kode dari google friend connect social bar yang telah Anda buat tadi di atas kode


dan Simpan


beres, selesai silahkan di coba... mungkin tampilan navbar blogger GFC ini bisa menambah daya tarik blog Anda, mantab salam ngeblog... semangat selalu.


Thanks source

Change title tags in blogger for SEO friendly

By default Blogger displays the blog title first, followed by the name of the post. As you might notice this is not good when it comes to SEO. It's important for the name of the post to come before the name of your blog, especially when it comes to google search results. Learn how to make your post title show up first so that you can reel in more traffic from the search engines.


Why Change the Titles?


It's quite important to have the Post Title + Blog Title arranged accordingly because this is how you would want your blog to be displayed on google's search results. This way more people will click on your link when searching google because the post title is more relevant than your post name.
Example Google Search Results:
You are most likely to click on the bottom image when searching google for the keywords "image reflection generator". The reason being is that your mind reads text from left to right. So it makes sense to have the more important title on the left.


  1. Go to Layout>edit HTML in your Blogger dashboard.
  2. Search for this tag: <data:blog.pageTitle/>
  3. Replace this tag with the following code:  <data:blog.title/> <data:blog.pageName/> | <data:blog.title/>
  4. Save your template and you should see the results in your web browser as depicted in the images below.
  5. It may take a few days for the changes to show up on the google search results. I guarantee you that you will start receiving more traffic from google once you are re-indexed!
Source here!

Sunday, July 17, 2011

Mengganti Icon Blogger pada address bar


Postingan hari ini kita bahas mengenai cara mengganti icon blogger dengan gambar2 ataupun foto anda sendiri di addressbar seperti icon diblog saya yang cantik itu,,hehe,,sebelumnya anda harus membuat dulu image atau mengedit gambar yang sudah ada menjadi berukuran 24 x 24 pixel up to 32 x 32 pixel,kemudian silakan upload gambar tersebut di photobucket.com, kenapa harus upload kesana? karena untuk mendapatkan kode URL image kita, masih bingung ya,,ya udah ikuti langkah- langkah berikut aja ya,,


1. Pilih gambar yang akan anda masukkan dengan ukuran yang saya sebutkan diatas
2. Silakan upload gambarnya diphotobucket.com, jika belum terdaftar di photobucket.com silakanregister disini
3.Setelah login silakan upload gambarnya di menu Upload File & Video dengan pilih tombol choose file
4.Setelah selesai upload akan muncul gambar anda dan ambil kode URL gambar anda seperti contoh kode URL image saya

http://i383.photobucket.com/albums/oo276/0512_photo/enny-1.jpg


5.Untuk memasukkan ke blog anda silakan kembali ke Dasboard blogger anda,silakan ke menu Layout->Edit HTML->jangan lupa klik Expand Widget kemudian temukan kode berikut


6. Setelah itu letakkan kode dibawah ini sebelum kode diatas


silakan ganti kode yang berwarna merah dengan URL gambar yang anda dapatkan di photobucket.com tadi

7.Kemudian Save Setting,,Selesai,,

Silakan lihat blog anda apakah iconnya sudah berubah dengan ganbar anda,,Semoga berhasil!!!

Sunday, July 10, 2011

Cara Memperlebar Halaman Blog


Mungkin sekarang waktunya untuk mengoprek Template kita sob agar tampilan blog kita sesuai dengan kemauan kita. Disini saya akan menjelaskan tentang Memperlebar Halaman Blog agar lebih dinamis dan nyaman untuk baca-baca, sebelum mengoprek Template kita saya akan menjelaskan sedikit tentang elemen yang perlu di lebarkan.

Sebelum saya menjelaskan dari masing-masing elemen-elemennya saya mau minta maaf kepada master-master blogger klo saya sok tahu atau sok pintar, saya hanya ingin membagikan ilmu kepada sobat setia blog saya.Okey simak masing-masing penjelasannya y sobat :
  1. Body ==>> elemen/area yang ada di paling belekang yang mencakup keseluruhan sebuah template
  2. #outer-wrapper ==>> elemen ini letaknya di depan body yang berisi elemen-elemen seperti #header, #main, #sidebar-wrapper, dan #footer-Wrapper
  3. #header ==>> karena namanya header ya berarti kepala artinya tempat atau areanya ada di atas Template yang berisi Judul blog dan Deskripsi Blog
  4. #main ==>> elemen yang satu ini isinya tentang artikel yang kita tulis atau post dan kotak komentar
  5. #sidebar-wrapper ==>> klo elemen yang satu ini isinya ya widget-widget yang biasa sob pakai seperti buku tamu trus statistik dll.
  6. #footer-wrapper ==>> elemen ini letaknya ada di paling bawah Template yang berguna untuk meletakkan Widget atau pun yang lain

Nah kalau sobat kurang mengerti tentang penjelasan di atas, nih saya kasih contoh gambarnya :

Nah sekarang sudah jelaskan 
Bagian-bagian dari Template. kalau memang ada yang kurang, maaf y sobat semua karena elemen-elemen tersebut saya ambil dari Template saya sendiri.

Oke Penjelasan sudah, Contoh gambar sudah sekarang apa lagi y?? oiya 
Cara Memperlebar Halaman Blog, ikuti y langkah-langkah di bawah ini :
  1. Login ke blogger dengan id sobat
  2. Masuk ke Tata Letak ==>> Edit HTML
  3. Sebelum mengoprek Backup dulu y Template sobat dengan cara Download Template Lengkap
  4. Setelah selesai membackup Template sobat cari kode yang akan di lebarkan, saya kasih contoh : #Outer-Wrapper, apabila sobat menggunakan Mozilla tekan Shift+F3 agar lebih mudah dalam pencarian
  5. Nah setelah ketemu akan ada tampilan kurang lebih seperti di bawah ini


    #outer-wrapper {
    background:#000;
    width:973px;
    margin:0 auto;
    padding:0;
    text-align:left;
    border:2px solid #1A1A1A;
    }

  6. Nah sobat perhatikan tulisan yang bercetak tebal dan miring, tulisan tersebut yang mempengaruhi lebar dari #outer-Wrapper. Apabila sobat ingin di perlebar tinggal ganti saja angka yang bercetak Tebal dan miring menjadi angka yang lebih tinggi dari semula.
  7. Nah kalau kira-kira sudah cukup jangan dimpan dulu takut tidak sesuai keinginan maka sobat harus melihat Preview-nya dengan mengklik Pratinjau
  8. Nah kalau sobat sudah lihat dan sesuai kenginan baru dech sobat Simpan
  9. Kalau untuk elemen yang lain ingin sobat perlebar sobat bisa coba sendiri ya, caranya sama seperti itu qo tanpa ada perbedaan.
  10. Nah sekarang selesai dech.

Share

Twitter Delicious Facebook Digg Stumbleupon Favorites

 
Photobucket